Deploy Flask application with TravisCI
TravisCI is a very nice service, which allows to easily build your own CI/CD platform using GitHub project and configuration file in YAML (YAML Ain’t Markup Language) format. Easy to read by ordinary people not speaking binary. CI/CD stands for Continuous Integration and Continuous Deployment (or Delivery). Basic concepts in modern software engineering, which are fancy terms for automating entire software production pipeline: from unit test, acceptance tests to deployment on the production server.
`
TravisCI & GitHub integration
First thing first, register account on https://travis-ci.org. The easiest way is to integrate TravisCI with your GitHub account. Go to the GitHub and initialize empty repository. Next go to the Travis profile page and sync repository. Your new project should appear on the list. Find it and enable webhook listening git repository changes on GitHub:
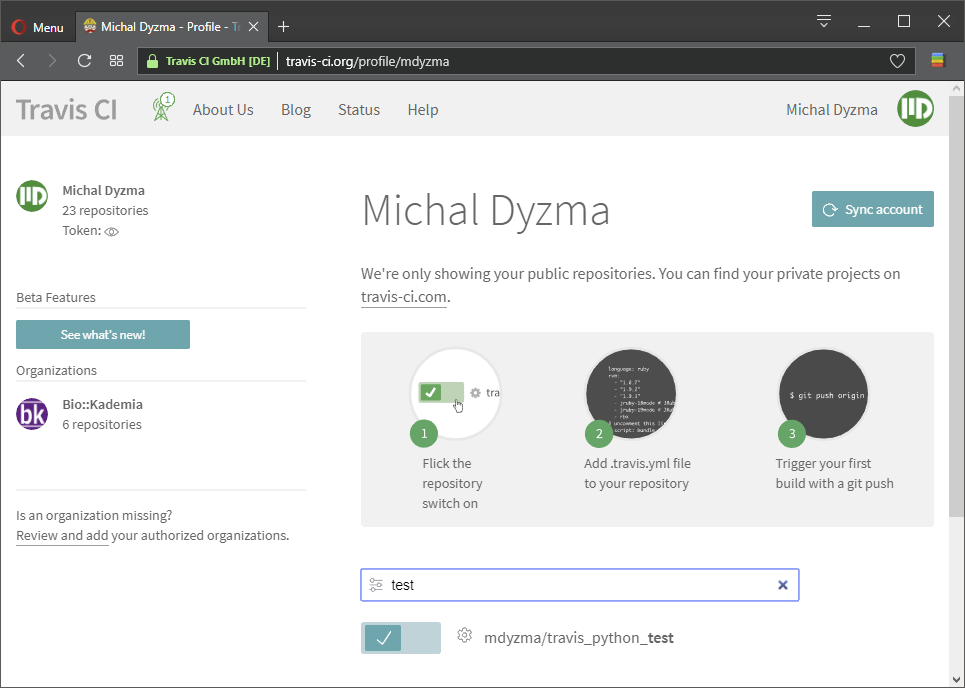
Now if you check GitHub’s settings tab -> Integration & services, you will find Travis on the list of connected services:

Project s listed on your main Travis Profile, but says “There is no build on the default branch yet.”. We need .travis.yml in our project
Travis YAML configuration file
To set TravisCI we have to place .travis.yml file in the application root directory. It will contain instructions for TravisCI service. Project structure should be similar to this:
[mdyzma@devbox GitHub]$ tree .
.
|-- flask_and_travis_ci/
    |-- .gitignore
    |-- .travis.yml
    |-- LICENSE
    `-- README.md
YAML is pretty easy to read and write. The most important parts of our CI system will be:
- language versions used to test app
- app dependencies installation
- running code metrics
- test coverage
- pep8 standard consistency check (style guide)
- running unit tests
- running acceptance test
- build latest documentation
- deployment to staging environment
First lets set language (Python obviously) and version of the interpreter:
.travis.yml
language: python

python:
    - 2.7
    - 3.5
    - 3.6
Requirements
Depending on your program this will cover 99.5% of all Python users. The 0.5% would cover exotic bio-it labs from the last century and European Space Agency data processing clusters. Rest already uses Python v3.6 at least. But let’s add 2.7 version just for sport. Now let’s install all the dependencies needed in our project.
It is best to keep dependencies organized in separate files. One for each environment. Main requirements.txt file contains link to the production environment dependencies (used by deployment service). For development purposes I will use superset of requirements from requirements/dev.txt
[mdyzma@devbox flask_and_travis_ci]$ tree .
.
|
|-- requirements/
|   |-- dev.txt
|   `-- prod.txt
`-- requirements.txt
Now we will link requirements/prod.txt to the requirements/dev.txt, so that installing development dependencies will also install all required in production (which means when application is accessible for users). For simple web application requirements may look like this:
requirements.txt
# requirements.txt
# Included because many Paas's require a requirements.txt file in the project root
# Just installs the production requirements.
-r requirements/prod.txt
requirements/prod.txt
# requirements/prod.txt

# Everything needed in production
# Flask
Flask==0.12.2

# Deployment
gunicorn==19.7.1

# Test
behave==1.2.5
WebTest==2.0.29
#only in python 2.7
mock==2.0.0
We will add more dependencies while app grows.
requirements/dev.txt
# requirements/dev.txt

-r prod.txt

# Debug
Flask-DebugToolbar==0.10.1

# PEP8
pylint==1.8.1

# Coverage
coverage==4.4.2

# Documentation
Sphinx==1.6.5
sphinx-autobuild==0.7.1
Installing requirements is easy:
[mdyzma@devbox GitHub]$ pip install -r requirements.txtCalling main requirements is enough to get application up and running, however for development other packages may be needed (i.e. debug toolbar). In development environment we should call:
[mdyzma@devbox GitHub]$ pip install -r requirements/dev.txt… and it is exactly what we are going to call in .travis.yml file:
.travis.yml
language: python

python:
    - "2.7"
    - "3.5"
    - "3.6"

# install dependencies
install:
  -pip install -r requirements/dev.txt
Now when all dependencies were installed successful pipeline should proceed to create code metrics, particularly test coverage and code consistency with PEP8.
Test coverage
Code coverage can be tested using coverage package. It is tricky to use, therefore some explanation might be useful. I am going to use traditional coverage tool to produce coverage report in html, which will be grabbed by codecov service (check: codecov.io), which is integrated with GitHub. You can enable codecov for all repositories in your GitHub account.
To get simple report is is enough to type:
[mdyzma@devbox flask_and_travis_ci]$coverage report -m webapp.py

Name        Stmts   Miss  Cover   Missing
-----------------------------------------
webapp.py       7      1    86%   32
But we want nice report. First we have to run our app using coverage, to allow it to gather execution data. However, we do not want to run our app (partially we do, but there is no test server prepared, so we will stick to the minimum plan, because it would launch dev server and stay like this). Instead we will run test_webapp.py, gather data, and create html report.
[mdyzma@devbox flask_and_travis_ci]$ coverage run test_webapp.py && coverage htmlThis should produce htmlcov directory in our app folder. The same will happen within Docker environment spined by TravisCI. We will install additional package codecov and run coverage. Upon success codecov will grab html or xml output and transform into concise and nice report, accessible on their site.
.travis.yml
# install dependencies
install:
  - pip install codecov

# run scripts
script:
  - coverage erase
  - coverage run test_webapp.py && coverage html

after_success:
  - codecov
PEP8 consistency
This is usually resolved on the level of IDE. Most modern Python IDE’s have style guide built in the code editor. Therefore, this step is usually skipped in many projects.
A Foolish Consistency is the Hobgoblin of Little Minds
It is true what Rober Martin wrote: Codes are read much longer time than being written. This style guide exists for consistency. The most important thing is to know when you should break consistency, to keep software maintenance efficient. For example this PEP you should not break backward compatibility. One of the modules allowing to test code style is pylint. Text report of pylint module may look like this:
[mdyzma@devbox flask_and_travis_ci]$ pylint webapp.py
No config file found, using default configuration
************* Module webapp
I: 25, 0: Locally disabling C0103 (locally-disabled)
C: 24, 0: Line too long (119/80) (line-too-long)


Report
======
8 statements analysed.

Raw metrics
-----------

+----------+-------+------+---------+-----------+
|type      |number |%     |previous |difference |
+==========+=======+======+=========+===========+
|code      |24     |66.67 |24       |=          |
+----------+-------+------+---------+-----------+
|docstring |5      |13.89 |5        |=          |
+----------+-------+------+---------+-----------+
|comment   |1      |2.78  |1        |=          |
+----------+-------+------+---------+-----------+
|empty     |6      |16.67 |6        |=          |
+----------+-------+------+---------+-----------+


External dependencies
---------------------
::

    flask
      \-Flask (webapp)


Messages by category
--------------------

+-----------+-------+---------+-----------+
|type       |number |previous |difference |
+===========+=======+=========+===========+
|convention |1      |1        |=          |
+-----------+-------+---------+-----------+
|refactor   |0      |0        |=          |
+-----------+-------+---------+-----------+
|warning    |0      |0        |=          |
+-----------+-------+---------+-----------+
|error      |0      |0        |=          |
+-----------+-------+---------+-----------+


Messages
--------

+-----------------+------------+
|message id       |occurrences |
+=================+============+
|locally-disabled |1           |
+-----------------+------------+
|line-too-long    |1           |
+-----------------+------------+


Global evaluation
-----------------
Your code has been rated at 8.75/10 (previous run: 8.75/10, +0.00)

Statistics by type
------------------

+---------+-------+-----------+-----------+------------+---------+
|type     |number |old number |difference |%documented |%badname |
+=========+=======+===========+===========+============+=========+
|module   |1      |1          |=          |100.00      |0.00     |
+---------+-------+-----------+-----------+------------+---------+
|class    |0      |0          |=          |0           |0        |
+---------+-------+-----------+-----------+------------+---------+
|method   |0      |0          |=          |0           |0        |
+---------+-------+-----------+-----------+------------+---------+
|function |1      |1          |=          |100.00      |0.00     |
+---------+-------+-----------+-----------+------------+---------+


Duplication
-----------

+-------------------------+------+---------+-----------+
|                         |now   |previous |difference |
+=========================+======+=========+===========+
|nb duplicated lines      |0     |0        |=          |
+-------------------------+------+---------+-----------+
|percent duplicated lines |0.000 |0.000    |=          |
+-------------------------+------+---------+-----------+
When we fix long comment line 24, we will get:
[mdyzma@devbox flask_and_travis_ci]$ pylint webapp.py
No config file found, using default configuration
************* Module webapp
I: 26, 0: Locally disabling C0103 (locally-disabled)


Report
======
8 statements analysed.

Statistics by type
------------------

+---------+-------+-----------+-----------+------------+---------+
|type     |number |old number |difference |%documented |%badname |
+=========+=======+===========+===========+============+=========+
|module   |1      |1          |=          |100.00      |0.00     |
+---------+-------+-----------+-----------+------------+---------+
|class    |0      |0          |=          |0           |0        |
+---------+-------+-----------+-----------+------------+---------+
|method   |0      |0          |=          |0           |0        |
+---------+-------+-----------+-----------+------------+---------+
|function |1      |1          |=          |100.00      |0.00     |
+---------+-------+-----------+-----------+------------+---------+


Raw metrics
-----------

+----------+-------+------+---------+-----------+
|type      |number |%     |previous |difference |
+==========+=======+======+=========+===========+
|code      |24     |64.86 |24       |=          |
+----------+-------+------+---------+-----------+
|docstring |5      |13.51 |5        |=          |
+----------+-------+------+---------+-----------+
|comment   |2      |5.41  |1        |+1.00      |
+----------+-------+------+---------+-----------+
|empty     |6      |16.22 |6        |=          |
+----------+-------+------+---------+-----------+


Messages by category
--------------------

+-----------+-------+---------+-----------+
|type       |number |previous |difference |
+===========+=======+=========+===========+
|convention |0      |1        |-1.00      |
+-----------+-------+---------+-----------+
|refactor   |0      |0        |=          |
+-----------+-------+---------+-----------+
|warning    |0      |0        |=          |
+-----------+-------+---------+-----------+
|error      |0      |0        |=          |
+-----------+-------+---------+-----------+

Global evaluation
-----------------
Your code has been rated at 10.00/10 (previous run: 8.75/10, +1.25)
And this is exactly what goes to the CI/CD system:
.travis.yml
# check style
script:
    - pylint --output-format=text webapp.py
Sometimes it is necessary to tweak pylint (especially in case of flask or python apps), to stop failing standard naming convention i.e. app = Flask(__name__). For application name app is just variable holding Flask class object. For pylin it is a global contant (visible in entire module), therefore should follow constants convention naming (capital letters, etc). We can tweak pylint to indicate variables we want to ignore. Or change its general behaviour changing regex, which is used to discover constants (check Pylint documentation).
Documentation
Project’s documentation is placed in docs/ folder and is based on excellent Python Sphinx module. Hearth of the documentation is conf.py file, where all extensions and static pages generator properties are configured.
[mdyzma@devbox flask_and_travis_ci]$ tree .
.
|
|-- docs/
|   |-- make.bat
|   |-- Makefile
|   `-- source/
|       |-- _static/
|       |-- _templates/
|       |-- conf.py
|       `-- index.rst
Creating basic documentation stub out of the box.
[mdyzma@devbox docs]$ sphinx-quickstart
Welcome to the Sphinx 1.6.3 quickstart utility.

Please enter values for the following settings (just press Enter to
accept a default value, if one is given in brackets).

...
Creating file ./source/conf.py.
Creating file ./source/index.rst.
Creating file ./Makefile.
Creating file ./make.bat.

Finished: An initial directory structure has been created.

You should now populate your master file ./source/index.rst and create other documentation
source files. Use the Makefile to build the docs, like so:
   make builder
where "builder" is one of the supported builders, e.g. html, latex or link check.
Following quick-start help, lets build basic html documentation:
[mdyzma@devbox docs]$ make html

Running Sphinx v1.6.5
loading pickled environment... done
building [mo]: targets for 0 po files that are out of date
building [html]: targets for 0 source files that are out of date
updating environment: 0 added, 0 changed, 0 removed
looking for now-outdated files... none found
no targets are out of date.
build succeeded.

Build finished. The HTML pages are in build/html.
During development, we will need to build document frequently. Autobuild tool will manage this task and will run local server, which will rebuild sphinx documentation, when it detects changes in .rst files. To start server type:
[mdyzma@devbox docs]$ sphinx-autobuild source build\html

+--------- manually triggered build ---------------------------------------------
| Running Sphinx v1.6.5
| loading pickled environment... not yet created
| building [mo]: targets for 0 po files that are out of date
| building [html]: targets for 1 source files that are out of date
| updating environment: 1 added, 0 changed, 0 removed
| reading sources... [100%] index
|
| looking for now-outdated files... none found
| pickling environment... done
| checking consistency... done
| preparing documents... done
| writing output... [100%] index
|
| generating indices... genindex
| writing additional pages... search
| copying static files... done
| copying extra files... done
| dumping search index in English (code: en) ... done
| dumping object inventory... done
| build succeeded.
+--------------------------------------------------------------------------------

[I 171214 23:05:00 server:283] Serving on http://127.0.0.1:8000
[I 171214 23:05:00 handlers:60] Start watching changes
[I 171214 23:05:00 handlers:62] Start detecting changes
Now we should be able to check docs page in the browser under http://127.0.0.1:8000 address.
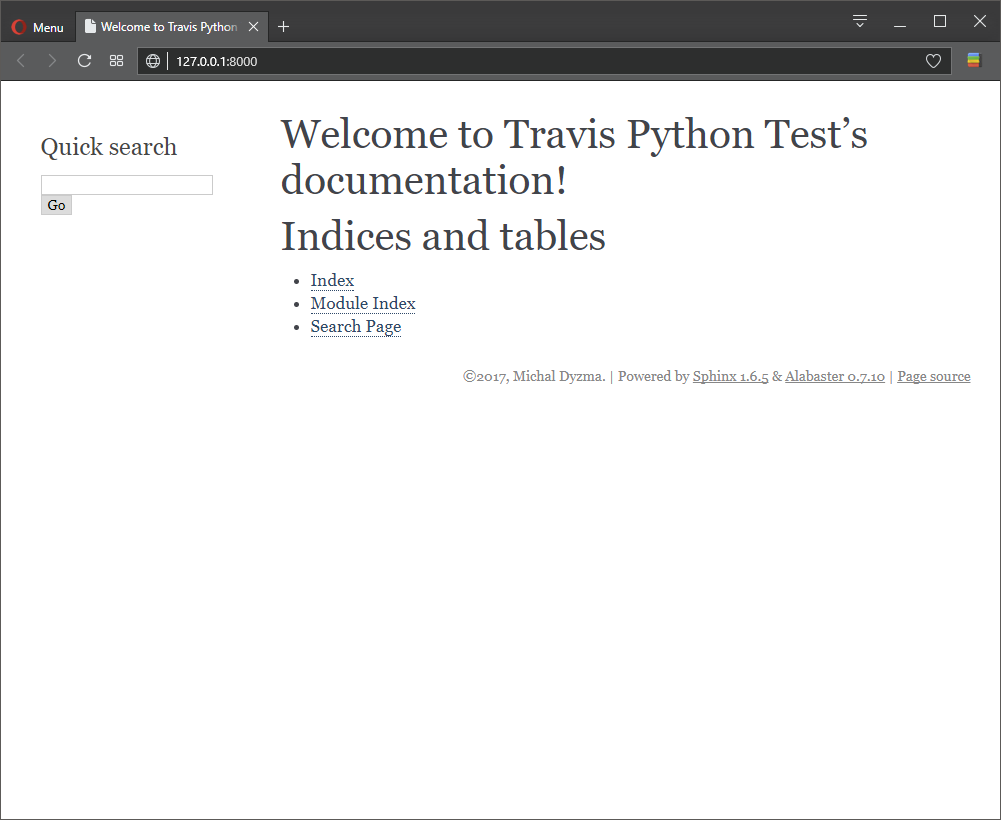
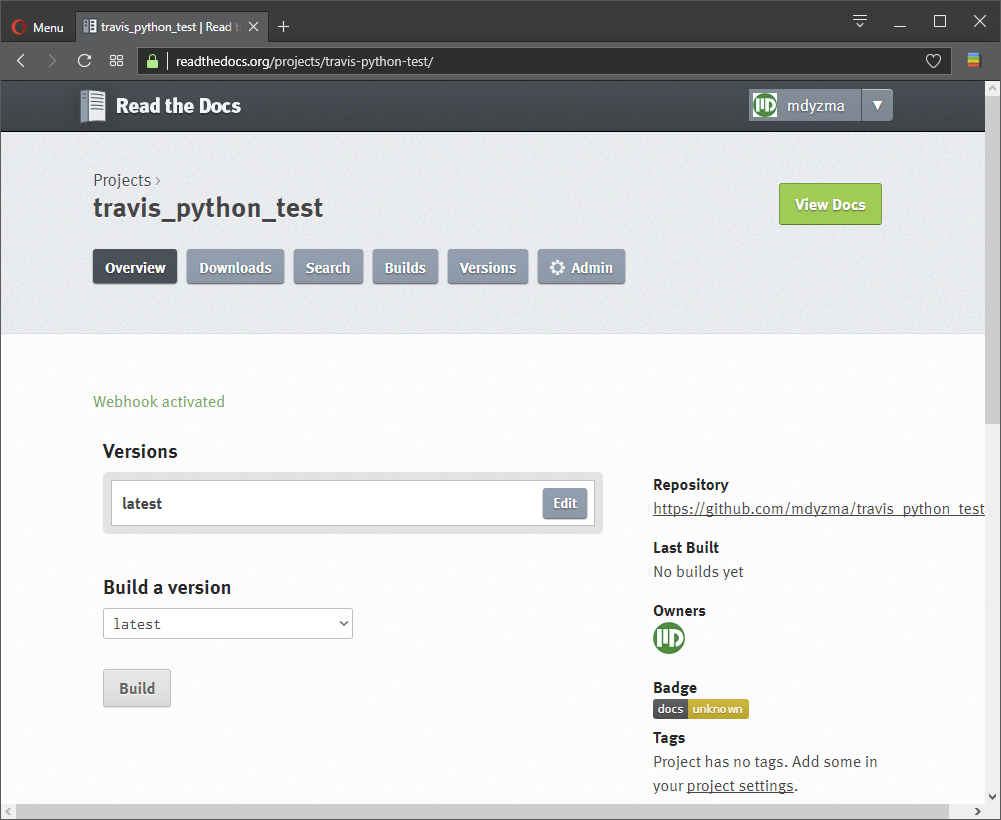
Additionally, we want to keep the latest documentation or even publish it online. But we do not need Travis do it. GitHub repository can be connected to the ReadTheDocs service, which will deploy our documentation on its servers whenever repo has been changed. No need to update .travis.yml. The only thing, that needs to be done is to connect ReadTheDocs webhook with GitHub repository.
BDD development
There are two types of tests I would like to put in this project prototype:
- unit tests
- acceptance tests
Unit tests are bound to specific module, class or method/function, while acceptance tests are derived from „User Stories”. Unit tests can be programmed using python’s STL module or very popular pytest. Acceptance tests use more natural language called Gherkin and python library behave. Agile development requires at least three steps:
- Write simple acceptance test
- Make acceptance test pass (using TDD in the inner loop)
- Refactor acceptance test
Second step in our case is usually series of unit tests for all modules taking part in acceptance test from top module to most nested one (so called “outside-in” approach). Behave enforces specific folder and file structure with some flexibility, but main components need to be set in our app. Typical structure of acceptance tests with behave is shown below:
[mdyzma@devbox flask_and_travis_ci]$ tree .
.
|
|-- features/
|   |-- environment.py
|   |-- home.feature
|   `-- steps/
|       `-- home_steps.py
|
`-- test_app.py
Acceptance tests
Another configuration file is located in features folder and exposes web application context to the test environment.
/features/environment.py
from webtest import TestApp

from app import app

def before_scenario(context, scenario):
    context.client = TestApp(app)


def after_scenario(context, scenario):
    del context.client
Basic element of acceptance test written in Gherkin. Each scenario is then translated to python code in steps folder.
features/home.feature
Feature: Index page display

    Scenario: Navigation to Home Page
        When I navigate to Home Page
        Then Home Page should be displayed
Execution of each step from features:
features/steps/home_steps.py
from behave import *

@when(u'I navigate to Home Page')
def step_impl(ctx):
    ctx.resp = ctx.client.get('/')

@then(u'{text} should be displayed')
def step_impl(ctx):
    assert text in ctx.resp
We have test, which fails. Now it is time to write simple unit test for our flask app.
Unit tests
Simple unit tests to check home() function. We will mock Flask app request, which returns whatever home function return when / view is called. There is a difference between Python 2 and Python 3 in using mock module. In Python 3 mock is already part of STL’s unittest module, while in Python 2 it is a separate module called mock.
test_app.py
import unittest
import webapp


class HomeViewTest(unittest.TestCase):

    def setUp(self):
      self.app = webapp.app.test_client()
      self.app.testing = True

    def test_home_page(self):
        home = self.app.get('/')
        self.assertIn('Home Page', str(home.data))


if __name__ == "__main__":
    unittest.main()
Test fails. Lets add unit tests and acceptance test in .travis.yml
.travis.aml
script:
    - python -m unittest discover
    - behave
Application
Lets place basic Flask application in webapp.py:
app.py
from flask import Flask

HTML = """
<!DOCTYPE html>
<html lang="en" class="full-height">
    <head>
        <title>Home | TravisCI</title>
        <meta charset="utf-8">
        <meta name="viewport" content="width=device-width, initial-scale=1.0">
        <meta http-equiv="X-UA-Compatible" content="IE=edge">
        <meta name="description" content="Social media analytic tool">
        <meta name="author" content="Michal Dyzma">
    </head>
    <body>
        <h1>Home Page</h1>

    </body>
</html>
"""

app = Flask(__name__)

@app.route('/')
def home():
    return HTML


if __name__ == '__main__':
    app.run()
Running tests now shows all is green and good to go.
Heroku deployment
To deploy project to the web we need nice server and domain. Heroku provides nice hosting for python apps. Free to play with (5 applications), test and check how our application might work in real life.
In order to do that we need some Heroku infrastructure. In fact, the only necessary element is Procfile, instructing Heroku machinery what to launch and how.
Following our app structure we can set following Procfile:
Procfile
web: gunicorn webapp:appAlso deployment may be automated as well. Let’s create Heroku app first.
Apps can be created via Heroku web interface or command line tool HerokuCLI. When it is installed type:
[mdyzma@devbox flask_and_travis_ci]$ heroku --version

heroku-cli/6.14.43-73d5876 (linux-x64) node-v9.2.0
It seems ok. Now lets login and create app:
Enter your Heroku credentials:
Email: mdyzma@gmail.com
Password: ************
Two-factor code: ******
Logged in as mdyzma@gmail.com
[mdyzma@devbox flask_and_travis_ci]$ heroku create --region eu --buildpack heroku/python flask-travis-ci
Creating ⬢ flask-travis-ci... done, region is eu
Setting buildpack to heroku/python... done
https://flask-travis-ci.herokuapp.com/ | https://git.heroku.com/flask-travis-ci.git
Now lets copy heroku api-key and add it to the .travis.yml using ruby travis gem, which will nicely secure it for us.
[mdyzma@devbox flask_and_travis_ci]$ gem install travis
...
14 gems installed
[mdyzma@devbox flask_and_travis_ci]$ travis encrypt $(heroku auth:token) --add deploy.api_key
Detected repository as mdyzma/travis_python_test, is this correct? |yes|
… this will add api key hash to the .travis.yml
.travis.yml
# Deployment to Heroku
branches:
  only:
    - master

deploy:
  - provider: heroku
    api_key:
      secure: mSo7Q2TGXZou3GwctrEX5MBW1CrcNDeocOsau2QT5aqvVb8LUcgL8NqytDiOhWOBVX8u3cxn0nSME+j/Edz8Zxcw21Ls4kpZJu8VsJkn8oF/rPflBWIrW/6kw3hMucfec82eUxCOub2juXMTMbCTspaiWAAnpvsaptVmNhXIkvic3OXxRKKg50he9dpRbqRtyPlgR8nyXFYKJCRedzSwufpQWJ8t/pMy+epp06A6Z0CjbqOByYFfpxx7Vkbzj/L3+j4degED1SsmMmL3OQJHp00PJAcKYNEgPBXpgvRcppY/pS9YH/UnDT5nulU/1+K/IiBP/8/SRNj8MXdzlSAXqFBevEbCKyJRfWLMZ3tflbhdm3/0OeSN/3ncc2ypuwXHE5K/Td/P5NuPLmD5vH+di53Hxo/RHmltCxAKturPjrM6uS0bB24KctyztLERDudZkIBYAAZBZJ2t7alWeMY+cgPkfzs9fw0w6+ECphesdI2ZovE5pXXKEqX9Z83fgkAlw1d1iPpfOrz28C4QT12gsopYNFzW76lKKAGRtEUH07bu/R8IB4xohgtTf9a57mYcMYDcYCpJtMkNbqIEgYRDSS9nKdnL6pLNoJPGxsLrLarAYWMA1k7j5UaPBMweSuOj7Haowf84eH4tc/W4CRKMBvJw/HTDIxXdJWEaicpfljI=
    app: flask-travis-ci
All done. Application is alive and served on Heroku:
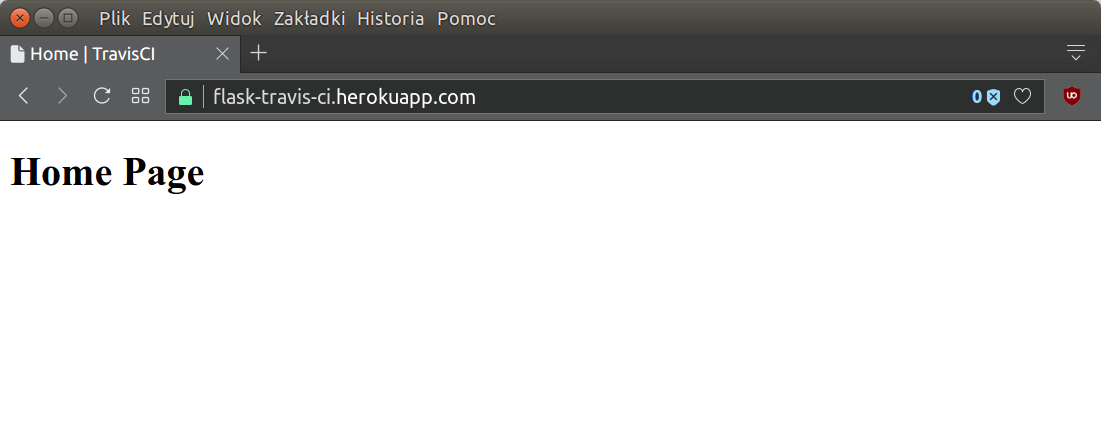
Temporary link to the working application: https://flask-travis-ci.herokuapp.com
Summary
We have created Flask application with automated pipeline spanning most important aspects of agile software development. From source control, to automatic code metrics, testing and deployment.
Finally projects .travis.yml file should look like this:
.travis.yml
language: python

python:
  - 2.7
  - 3.5
  - 3.6

install:
  - pip install -r requirements/dev.txt
  - pip install codecov

script:
  - python -m unittest discover
  - behave
  - coverage erase
  - coverage run test_webapp.py && coverage html
  - pylint --output-format=text webapp.py

after_success:
  - codecov

deploy:
  - provider: heroku
    api_key:
      secure: mSo7Q2TGXZou3GwctrEX5MBW1CrcNDeocOsau2QT5aqvVb8LUcgL8NqytDiOhWOBVX8u3cxn0nSME+j/Edz8Zxcw21Ls4kpZJu8VsJkn8oF/rPflBWIrW/6kw3hMucfec82eUxCOub2juXMTMbCTspaiWAAnpvsaptVmNhXIkvic3OXxRKKg50he9dpRbqRtyPlgR8nyXFYKJCRedzSwufpQWJ8t/pMy+epp06A6Z0CjbqOByYFfpxx7Vkbzj/L3+j4degED1SsmMmL3OQJHp00PJAcKYNEgPBXpgvRcppY/pS9YH/UnDT5nulU/1+K/IiBP/8/SRNj8MXdzlSAXqFBevEbCKyJRfWLMZ3tflbhdm3/0OeSN/3ncc2ypuwXHE5K/Td/P5NuPLmD5vH+di53Hxo/RHmltCxAKturPjrM6uS0bB24KctyztLERDudZkIBYAAZBZJ2t7alWeMY+cgPkfzs9fw0w6+ECphesdI2ZovE5pXXKEqX9Z83fgkAlw1d1iPpfOrz28C4QT12gsopYNFzW76lKKAGRtEUH07bu/R8IB4xohgtTf9a57mYcMYDcYCpJtMkNbqIEgYRDSS9nKdnL6pLNoJPGxsLrLarAYWMA1k7j5UaPBMweSuOj7Haowf84eH4tc/W4CRKMBvJw/HTDIxXdJWEaicpfljI=
    app: flask-travis-ci