Social media analysis with Flask, Part II

Flask application presenting social media accounts analysis in form of dashboard. It transforms various data sources into clear and concise report. Part II describes creation of landing page and dashboard, including blueprints pattern, jinja templates, login/register mechanism and data storage in development and production.
Series consists of:
- Social media analysis with Flask, Part I (Setting environment, flask, Travis CI/Heroku CD )
- Social media analysis with Flask, Part II (Templates, login/register mechanism, data storage)
Part II
Project organization
Flask auto-magically finds templates or static files in the app directory, but it is a good idea to structure things a little.
From organizational point of view, most preferable is modular packaging of files, that specific parts of our application can be moved and adopted to other projects as a whole with its own routing mechanism, static files and templates. Therefore we will write specific components like dashboard or user management and place in separate folders and python packages. So we will have public component (in this context component comprises of python package and folder with the same name placed in templates/) with landing page accessible for all users. And some other components restricted only for logged users i.e. user or dashboard), which will be placed in separate folders. This kind of packaging allows to produce modular and easy to reuse code.
The landing page is bound to the main endpoint of the app / and will reside in public/ package. Other have their own endpoints i.e /users/ or /dashboard/, and are placed in packages specific for them. We will adopt Flask blueprints pattern, which means the basic structure for each component will comprise of blueprint and it’s business logic, which will be registered with the main app.
![app-diagram][app_diag]
Repeatedly used, large blocks of code like nav, head or footer may become quite complicated, therefore it is better to flatten template structure even more and incorporate them as separate html files from templates/includes/.
To sum up, each large component will have it’s own folder in the app/ and template/, to make it maximally portable. Each page will use common set of tools provided by frameworks and stored in static/.
- dashboard: routs, models, forms, db communication for data presentation
- public: routs, forms and models for home page
- static: all static files served by the app, including css styles, JavaScript, images or fonts.
- templates: basic layout blueprint and error pages
- dashboard: templates to the dashboard
- includes: partial HTML snippets for specific purpose i.e. navigation bar, footer, part of templates folder.
- public: landing page and login/register templates
- user: user profile templates
- user: routes, models, forms and db communication for user data
Finally lest focus a bit on the stack of tools which will be used in this application. Obviously back-end is Flask and gunicorn. User data will be stored in MongoDB. Front-end will use two popular frameworks: Twitter Bootstrap 4 to make page responsive and nice without having to write extensive CSS and Material Design for Bootstrap, to make things more beautiful. For Bootstrap framework we will need to download already compiled css from Bootstrap’s page files: bootstrap.min.css and bootstrap.min.js. Bootstrap relies on jQuery, a JavaScript framework that provides a layer of abstraction in most common JavaScript operations (i.e. element selection, events handling). Therefore we should also add latest JQuery library jquery-3.2.1.min.js to our files. For MDB we will need mdb.min.css, mdb.min.js and popper.min.js. They will spice up our web site and give lots of good solutions and JavaScript functionalities to it. Files should be placed in appropriate static sub-folders:
(md_analytics) [mdyzma@devbox md_analytics]$ tree .
.
|-- app/
|   |-- public/
|   |   |-- __init__.py
|   |   |-- forms.py
|   |   `-- views.py
|   |
|   |-- static/
|   |   |-- css/
|   |   |   |-- bootstrap.min.css
|   |   |   |-- mdb.min.css
|   |   |   `-- style.css
|   |   |
|   |   |-- font/
|   |   |
|   |   |-- img/
|   |   |
|   |   |-- js/
|   |   |   |-- bootstrap.min.js
|   |   |   |-- jquery-3.2.1.min.js
|   |   |   |-- mdb.min.js
|   |   |   `-- popper.min.js
|   |   `-- favicon.ico
|   |
|   |-- templates/
|   |   |
|   |   |-- dashboard/
|   |   |
|   |   |-- includes/
|   |   |-- |-- contact.html
|   |   |   |-- footer.html
|   |   |   |-- meta.html
|   |   |   |-- messages.html
|   |   |   `-- nav.html
|   |   |
|   |   |-- public/
|   |   |   |-- home.html
|   |   |   |-- login.html
|   |   |   `-- register.html
|   |   |
|   |   |-- user/
|   |   |   `-- profile.html
|   |   |
|   |   |-- 404.html
|   |   `-- layout.html
|   |
|   |-- __init__.py
|   |-- app.py
|   |-- extensions.py
|   |-- settings.py
...
Jinja engine
Flask uses very powerful and flexible template engine called Jinja2. It allows to define website in small blocks, one by one, which then are pieced together, to form complete HTML pages. The power of Jinja relies on possibility to push some portion of logic like iterations over containers or table rows, some flow control with if or while statements, some text processing capabilities like filtering, even mathematical operations and files handling. All this can be accedes from the web HTML template level. Still most important feature of Jinja is template inheritance mechanism similar to class inheritance in python. Basic layout template provides set of blocks, which can be overridden by the content of the specific page. Also changes, or bugs fixes are much easier, since the HTML for each part of the site exists in one place - template file.
In templates we will use several Jinja elements, which will build dynamic structure skeleton. Most frequently used Jinja elements are so called statements (enclosed in {% ... %}) and expressions (enclosed in {{ ... }}). Statements provide different means of the work-flow control, for example if, with conditionals or for loops and some pre-defined Jinja tags i.e. block, include, call. Expressions, on the other hand, display dictionary based variables passed to the engine via Flask context mechanism. For more details, please refer to the Jinja documentation.
Layout
In our template we have specified several large code blocks, which will be filled with details in children templates. The most basic template, the architectural foundation for each page of our application, is called layout.html. It contains all elements required by the browser to serve modern page and are common for entire project. It also includes links to the framework files used in the project (.css and .js). From our point of view most important sections are:
- head section:
- title - dynamic tab title
- meta - with necessary metadata and responsive design directives
- seo - for proper SEO information like Open Graph and Twitter cards
- styles - place for custom css styles present at specific page
- body :
- nav - where we place navigation bar common for all pages
- messages - part displaying application messages to the user
- intro - part specific for landing page
- content block - different content on each page
- contact block - contact info/form
- footer section - basic structural element with extended footer information like site map, and other links
Base template with all the links to partial templates and code blocks should look similar to this:
/templates/layout.html
1
2
3
4
5
6
7
8
9
10
11
12
13
14
15
16
17
18
19
20
21
22
23
24
25
26
27
28
29
30
31
32
33
34
35
36
37
38
39
40
41
42
43
44
45
46
47
48
<!DOCTYPE html>
<html lang="en">
    <head>
        <title>{% block title %}{% endblock %} | MD-Analytics</title>
        <!-- Head section meta from include -->
        {% include 'includes/meta.html' ignore missing %}
        {% block seo %}{% endblock %}
        {% block styles %}{% endblock %}
    </head>
    <body>
        <header>
            <!-- Top navigation bar from include -->
            {% include 'includes/nav.html' ignore missing %}
            <!-- Messages flashed to the user -->
            {% include 'includes/messages.html' ignore missing %}
            <!-- Landing page intro, carousel and other  -->
            {% block intro %}{% endblock %}
        </header>
        <main>
            <!-- Main content block -->
            {% block content %}{% endblock %}
            {% block contact %}{% endblock %}
        </main>
            <!-- Footer from include -->
            {% include 'includes/footer.html' ignore missing %}
            <!-- jQuery (jQuery may be replaced with other modern JS library to manipulate DOM i.e. `vue.js`) -->
            <script type="text/JavaScript" src="{{ url_for('static', filename='js/jquery-3.2.1.min.js') }}"></script>
            <!-- popper -->
            <script type="text/JavaScript" src="{{ url_for('static', filename='js/popper.min.js') }}"></script>
            <!-- Bootstrap core JavaScript -->
            <script type="text/JavaScript" src="{{ url_for('static', filename='js/bootstrap.min.js') }}"></script>
            <!-- MDB core JavaScript -->
            <script type="text/JavaScript" src="{{ url_for('static', filename='js/mdb.min.js') }}"></script>
            <!--Google Maps-->
            <script src="https://maps.google.com/maps/api/js"></script>
            {% block scripts %}
            <!-- Smooth scrolling to the target anchor -->
                <script>
                    $('a').click(function(){
                        $('html, body').animate({
                            scrollTop: $( $(this).attr('href') ).offset().top
                        }, 500);
                        return false;
                    });
                </script>
            {% endblock %}
    </body>
</html>
Head section
Some fragments of HTML are moved to separate html files to keep main template lean and understandable. Fragments like main navigation bar or footer can be quite large and it could affect code readability. Base includes are located in app/templates/includes/ and will be described separately.
Alongside large meta.html include there are other blocks building head section of the page. They will differ for specific pages. All special parts of head section are enclosed in separate code blocks: title, seo and styles blocks. Title dynamically manages page title on the tab. SEO is responsible for specific meta information related to page promoting in social media i.e Open Graph tags and other meta properties used during linking specific page in popular services. If people want to share it on Facebook, LinkedIn, WhatsApp etc, we can control the appearance of “sharing previews” of a website by means of Open Graph meta tags. There is also additional styles block, which is empty in basic template, but allows to incorporate additional css for each child page.
Meta part from head section of the page contains meta information common for entire project, like links to the style sheets or fonts, information for proper indexing by search engines or gathering page statistics i.e. from Google analytics:
/templates/includes/meta.html
1
2
3
4
5
6
7
8
9
10
11
12
13
14
15
<meta charset="utf-8">
<meta http-equiv="X-UA-Compatible" content="IE=edge">
<meta name="viewport" content="width=device-width, initial-scale=1.0">
<meta name="description" content="Social media analytic tool">
<meta name="author" content="Michal Dyzma">
<!-- Fonts -->
<link rel="stylesheet" href="https://maxcdn.bootstrapcdn.com/font-awesome/4.7.0/css/font-awesome.min.css">
<link href="https://fonts.googleapis.com/css?family='Fontdiner+Swanky'" rel="stylesheet">
<!-- Bootstrap CSS -->
<link rel=stylesheet type=text/css href="{{ url_for('static', filename='css/bootstrap.min.css') }}">
<!-- Bootstrap Material Design -->
<link rel=stylesheet type=text/css href="{{ url_for('static', filename='css/mdb.min.css') }}">
<!-- Your custom styles (optional) -->
<link rel=stylesheet type=text/css href="{{ url_for('static', filename='css/style.css') }}">
<link rel="shortcut icon" href="{{ url_for('static', filename='favicon.ico') }}">
Order of linked css is important. The latter file will overwrite same functionalities from the previous one.
Body section
Body section contains several distinct blocks: navbar.html, messages.html, intro and footer.html. Last is scripts block which allows to include site specific JS scripts at the end of the page. It is considered best practice to place JS scripts near closing body tag, which speeds up page loading and ensures, that all page is already rendered, when scripts start to invoke DOM (Document Object Model) operations.
Main navigation bar is common for all pages in the app and will be fixed at the top of the site. It is pretty standard navigation bar, based on Bootstrap and MDB. There is also some Flask helper function enclosed in Jinja variable {{ url_for('index') }} to manage finding url for main entry point for our application, which is landing page.
/templates/includes/nav.html
1
2
3
4
5
6
7
8
9
10
11
12
13
14
15
16
17
18
19
20
21
22
23
24
25
26
27
28
29
<nav class="navbar navbar-expand-lg navbar-dark elegant-color-dark justify-content-between">
    <a class="navbar-brand" href="{{ url_for('index') }}">
        <strong style="font-family:'Fontdiner Swanky', cursive;">MD ANALYTICS</strong>
    </a>
    <button class="navbar-toggler" type="button" data-toggle="collapse" data-target="#navbarSupportedContent" aria-controls="navbarSupportedContent" aria-expanded="false" aria-label="Toggle navigation">
        <span class="navbar-toggler-icon"></span>
    </button>
    <div class="collapse navbar-collapse" id="navbarSupportedContent">
        <ul class="navbar-nav mr-auto">
            <li class="nav-item">
                <a class="nav-link" href="http://md_analytics.readthedocs.io/en/latest/?badge=latest">Documentation</a>
            </li>
            <li class="nav-item">
                <a class="nav-link" href="https://github.com/mdyzma/md_analytics">GitHub</a>
            </li>
            <li class="nav-item">
                <a class="nav-link" href="{{ url_for('public.home') }}#contact">Contact</a>
            </li>
        </ul>
        <ul class="navbar-nav ml-auto">
            <li class="nav-item">
                <a class="nav-link" href="#">Login</a>
            </li>
            <li class="nav-item">
                <a class="nav-link" href="#">Sign Up!</a>
            </li>
        </ul>
    </div>
</nav>

Later we will expand it with some logic for sessions and accessing restricted pages.
Messages box, will display all communicates produced by application. Every feedback improves tremendously user experience with the app. It consists of simple div and some Jinja logic to manage messages produced by Flask:
/templates/includes/messages.html
1
2
3
4
5
6
7
8
9
10
11
12
<div class="container">
{% with messages = get_flashed_messages(with_categories=true) %}
{% if messages %}
{% for category, message in messages %}
<div class="alert alert-{{ category }} alert-dismissible" role="alert">
<button type="button" class="close" data-dismiss="alert" aria-label="Close"><span aria-hidden="true">×</span></button>
{{ message }}
</div>
{% endfor %}
{% endif %}
{% endwith %}
</div>
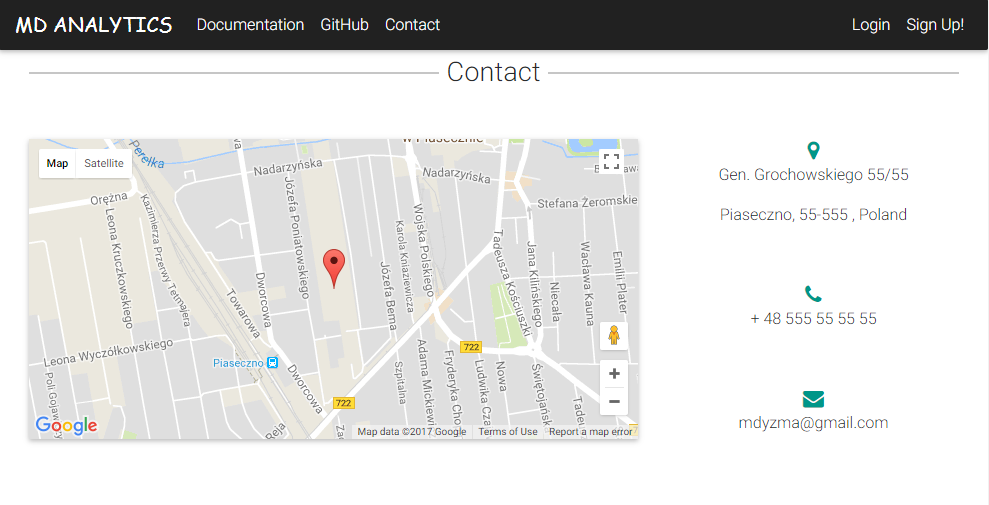
At some point we will also try to include contact information. For now it is map with marked location (using Google Map API) and some contact details.
/templates/includes/contact.html
1
2
3
4
5
6
7
8
9
10
11
12
13
14
15
16
17
18
19
20
21
22
23
24
25
26
27
<!--Section: Contact-->
<section id="contact pb-5">
    <div class="row">
        <!--First column-->
        <div class="col-md-8 mb-5">
            <div id="map-container" class="z-depth-1 wow fadeIn" style="height: 300px"></div>
        </div>
        <!--/First column-->
        <!--Second column-->
        <div class="col-md-4">
            <ul class="text-center list-unstyled">
                <li class="wow fadeIn" data-wow-delay="0.2s"><i class="fa fa-map-marker teal-text fa-lg"></i>
                    <p>Gen. Grochowskiego 55/55</p>
                    <p>Piaseczno, 55-555 , Poland</p>
                </li>
                <li class="wow fadeIn mt-5 pt-2" data-wow-delay="0.3s"><i class="fa fa-phone teal-text fa-lg"></i>
                    <p>+ 48 555 55 55 55</p>
                </li>
                <li class="wow fadeIn mt-5 pt-2" data-wow-delay="0.4s"><i class="fa fa-envelope teal-text fa-lg"></i>
                    <p>mdyzma@gmail.com</p>
                </li>
            </ul>
        </div>
        <!--/Second column-->
    </div>
</section>
<!--Section: Contact-->
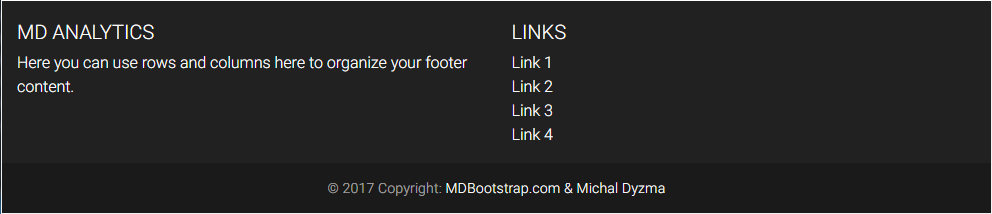
Footer part will be also common to all pages. It will include some extended information about policies, social media links and other standard “footer content”. Code snippet bellow is just simple copyright tag and two column structure for extended content.
/templates/includes/footer.html
1
2
3
4
5
6
7
8
9
10
11
12
13
14
15
16
17
18
19
20
21
22
23
24
25
26
27
28
29
30
31
32
33
34
<!--Footer-->
<footer class="page-footer blue center-on-small-only">
<!--Footer Links-->
<div class="container-fluid">
<div class="row">
<!--First column-->
<div class="col-md-6">
<h5 class="title">MD Analytics</h5>
<p>Here you can use rows and columns here to organize your footer content.</p>
</div>
<!--/.First column-->
<!--Second column-->
<div class="col-md-6">
<h5 class="title">Links</h5>
<ul>
<li><a href="#!">Link 1</a></li>
<li><a href="#!">Link 2</a></li>
<li><a href="#!">Link 3</a></li>
<li><a href="#!">Link 4</a></li>
</ul>
</div>
<!--/.Second column-->
</div>
</div>
<!--/.Footer Links-->
<!--Copyright-->
<div class="footer-copyright">
<div class="container-fluid">
© 2017 Copyright: <a href="https://www.MDBootstrap.com"> MDBootstrap.com & Michal Dyzma</a>
</div>
</div>
<!--/.Copyright-->
</footer>
<!--/.Footer-->
This is just an example from MDB tutorial. Exact code for footer can be downloaded from the footer template on GitHub.
Putting it all together we are ready to create first page for our app - the landing page!
Landing page
It is time to expand main application and put in use templates created above. First we will create web page endpoints, add some basic extensions to it and display everything as a nice, responsive landing page.
Blueprint
Earlier, when project organization was explained I mentioned all components will reside in their own folders to maximize portability. Landing page (home) resides in public folder and this part of the application can be accessed by anyone. Folder contains blueprint for landing page and login/register forms. Folder with the same name was also placed in templates/, to store necessary html boilerplate. To move this functionality to other app one has to copy both public folder to new location and make necessary imports.
Blueprint contains all routing for the pages that have something common. For now our landing page contains only few routs: / to render home page, /login and /register to display login and register forms. For now each method renders specific template. Login and register will be updated in the next section, where we will add data storage layer, safe database communication and sessions.
/app/public/views.py
1
2
3
4
5
6
7
8
9
10
11
12
13
14
15
16
17
18
19
20
21
22
23
24
25
26
27
28
from flask import Blueprint, render_template, redirect


home = Blueprint('public', __name__, static_folder='../static')


@home.route('/')
def home():
    """Home page."""
    return render_template('public/home.html')


@home.route('/login')
def login():
    """Login form."""
    return render_template('public/login.html')


@home.route('/register')
def register():
    """Register form."""
    return render_template('public/register.html')


@home.route('/logout')
def logout():
    """Logout link."""
    return redirect(url_for('home'))
Once all endpoints and functions are ready, we have to register blueprint with main app. But before we do that, lets refactor our app. We will use several flask extensions, which will help to develop certain functionalities very fast. There is no need to develop wheel again. Instead of writing our own data-base models, login classes etc, we can use already existing solutions i.e. extensions. Extensions will reside in separate file extensions.py, where they will be instantiated. Separate function will bind existing extension instances with the current app. First lets create extension’s package:
/app/extensions.py
1
2
3
from flask_debugtoolbar import DebugToolbarExtension

debug_toolbar = DebugToolbarExtension()
We will repeat this pattern with all Flask extensions. Having extensions ready we can register everything with main application:
/app/app.py
1
2
3
4
5
6
7
8
9
10
11
12
13
14
15
16
17
18
19
20
21
from app.extensions import debug_toolbar
from app import public

def create_app(config_object=None):
    app = Flask(__name__)
    app.config.from_object(config_object)
    register_extensions(app)
    return app


def register_extensions(app):
    """Register Flask extensions."""
    debug_toolbar.init_app(app)
    app.logger.debug("Debug toolbar initialized")
    return None


def register_blueprints(app):
    """Register Flask blueprints."""
    app.register_blueprint(public.views.home)
    return None
This file will initialize flask app, register all extensions and blueprints to the current context. We can print all endpoints using manage.py show-urls command:
(md_analytics) [mdyzma@devbox md_analytics]$ python manage.py show-urls

--------------------------------------------------------------------------------
DEBUG in app [/home/mdyzma/md_analytics/app/app.py:27]:
Debug toolbar initialized
--------------------------------------------------------------------------------
Rule                                          Endpoint
---------------------------------------------------------------------------
/                                             public.home
/login                                        public.login
/logout                                       public.logout
/register                                     public.register
/static/<path:filename>                       static
/static/<path:filename>                       public.
Template
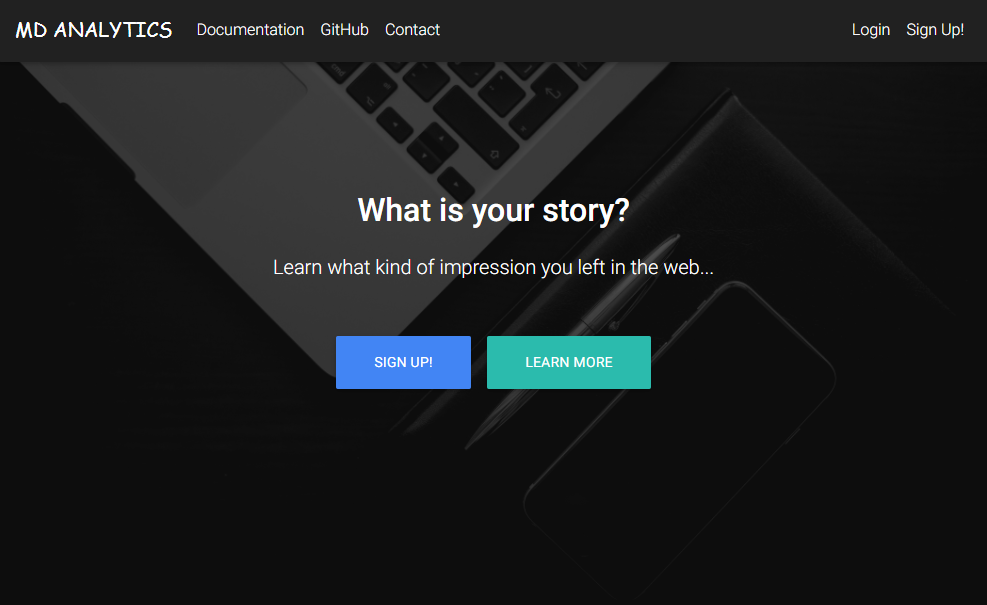
Landing page template is located in templates/public/home.html. Because it inherits all traits of layout.html it will contain only elements which differ between this two templates. Rest will be provided from base. First we should tell Jinja what template we are extending and populate current home template with site-specific content. Lets add “intro” for our page:
/templates/public/home.html
1
2
3
4
5
6
7
8
9
10
11
12
13
14
15
16
17
18
19
20
21
22
23
24
25
26
27
28
29
30
31
32
33
34
35
36
{% extends "layout.html" %}
<!-- Title for each page -->
{% block title %}Home{% endblock %}
<!-- Site Specific Styles -->
{% block styles %}
<style>
    /* TEMPLATE STYLES */
    .flex-center {
        color: #fff;
    }
    .intro-1 {
        background: url("https://mdbootstrap.com/img/Photos/Horizontal/Work/full page/img%20(2).jpg")no-repeat center center;
        background-size: cover;
    }
</style>
{% endblock %}
<!--Intro Section-->
{% block intro %}
<section class="view intro-1 hm-black-strong">
    <div class="full-bg-img flex-center">
        <div class="container">
            <ul>
                <li>
                    <h1 class="h1-responsive font-bold wow fadeInDown" data-wow-delay="0.2s">What is your story?</h1></li>
                <li>
                    <p class="lead mt-4 mb-5 wow fadeInDown">Learn what kind of footprint you created in the web...</p>
                </li>
                <li>
                    <a target="_blank" href="https://mdbootstrap.com/getting-started/" class="btn btn-primary btn-lg wow fadeInLeft" data-wow-delay="0.2s" rel="nofollow">Sign up!</a>
                    <a target="_blank" href="https://mdbootstrap.com/material-design-for-bootstrap/" class="btn btn-default btn-lg wow fadeInRight" data-wow-delay="0.2s" rel="nofollow">Learn more</a>
                </li>
            </ul>
        </div>
    </div>
</section>
{% endblock %}
Intro should be fully scalable and adjust to the screen width. We can expand page further, adding other typical elements like About section, cards with features, testimonials etc…
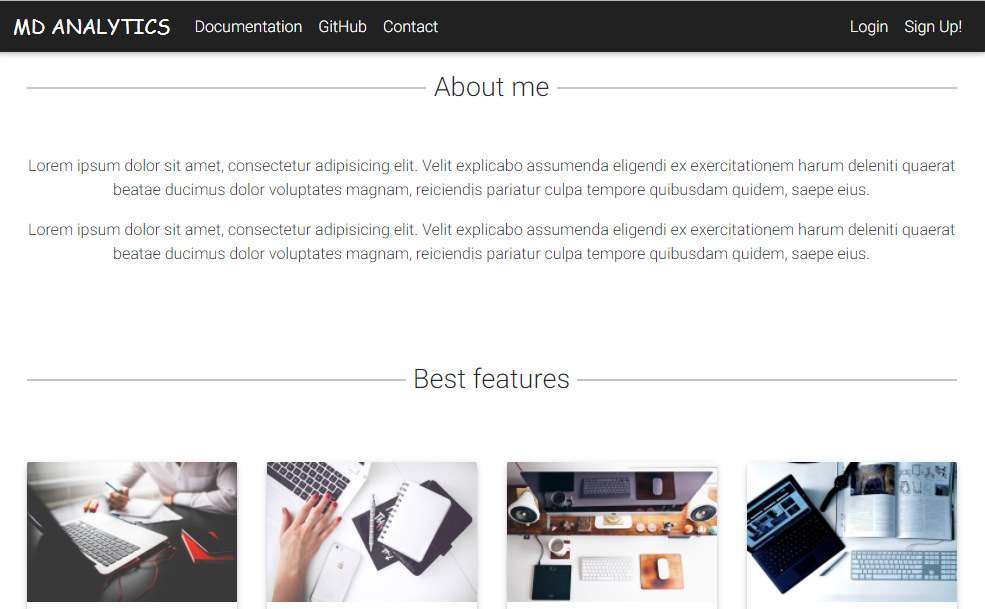
content block will only have some random “About” section and some “contact” info with simple Google map with a marker. It is just exemplary content from MDB tutorial to show framework’s capabilities. I would like to focus this blog series more on back-end part of the project, therefore front will be limited to the bare minimum.
/templates/public/home.html
1
2
3
4
5
6
7
8
9
10
11
12
13
14
15
16
17
18
19
20
21
22
23
24
25
26
27
28
29
30
31
32
33
34
35
36
37
38
39
40
41
42
43
44
45
46
47
48
49
50
51
52
53
54
55
56
57
58
59
60
61
62
63
64
65
66
67
68
69
70
71
72
73
74
75
76
77
78
79
80
81
82
83
84
85
86
87
88
89
90
91
92
93
94
95
96
97
98
99
100
101
102
103
104
105
106
107
108
<!-- Content -->
{% block content %}
<div class="container">
    <div class="divider-new pt-5">
        <h2 class="h2-responsive wow fadeIn" data-wow-delay="0.2s">About me</h2>
    </div>
    <!--Section: About-->
    <section id="about" class="text-center wow fadeIn" data-wow-delay="0.2s">
        <p>Lorem ipsum dolor sit amet, consectetur adipisicing elit. Velit explicabo assumenda eligendi ex exercitationem harum deleniti quaerat beatae ducimus dolor voluptates magnam, reiciendis pariatur culpa tempore quibusdam quidem, saepe eius.</p>
        <p>Lorem ipsum dolor sit amet, consectetur adipisicing elit. Velit explicabo assumenda eligendi ex exercitationem harum deleniti quaerat beatae ducimus dolor voluptates magnam, reiciendis pariatur culpa tempore quibusdam quidem, saepe eius.</p>
    </section>
    <!--Section: About-->
        <div id="features">
            <!-- dummy section for link -->
        </div>
       <div class="divider-new pt-5">
            <h2 class="h2-responsive wow fadeIn">Best features</h2>
        </div>
        <!--Section: Best features-->
        <section id="best-features">
            <div class="row pt-3">
                <!--First columnn-->
                <div class="col-lg-3 mb-r">
                    <!--Card-->
                    <div class="card wow fadeIn">
                        <!--Card image-->
                        <img class="img-fluid" src="https://mdbootstrap.com/img/Photos/Horizontal/Work/4-col/img%20(25).jpg" alt="Card image cap">
                        <!--Card content-->
                        <div class="card-body">
                            <!--Title-->
                            <h4 class="card-title text-center">360 Advertising</h4>
                            <hr>
                            <!--Text-->
                            <p class="card-text">Some quick example text to build on the card title and make up the bulk of the card's content.</p>
                        </div>
                    </div>
                    <!--/.Card-->
                </div>
                <!--First columnn-->
                <!--Second columnn-->
                <div class="col-lg-3 mb-r">
                    <!--Card-->
                    <div class="card wow fadeIn" data-wow-delay="0.2s">
                        <!--Card image-->
                        <img class="img-fluid" src="https://mdbootstrap.com/img/Photos/Horizontal/Work/4-col/img%20(14).jpg" alt="Card image cap">
                        <!--Card content-->
                        <div class="card-body">
                            <!--Title-->
                            <h4 class="card-title text-center">Top-class Team</h4>
                            <hr>
                            <!--Text-->
                            <p class="card-text">Some quick example text to build on the card title and make up the bulk of the card's content.</p>
                        </div>
                    </div>
                    <!--/.Card-->
                </div>
                <!--Second columnn-->
                <!--Third columnn-->
                <div class="col-lg-3 mb-r">
                    <!--Card-->
                    <div class="card wow fadeIn" data-wow-delay="0.4s">
                        <!--Card image-->
                        <img class="img-fluid" src="https://mdbootstrap.com/img/Photos/Horizontal/Work/4-col/img%20(21).jpg" alt="Card image cap">
                        <!--Card content-->
                        <div class="card-body">
                            <!--Title-->
                            <h4 class="card-title text-center">Top-class Team</h4>
                            <hr>
                            <!--Text-->
                            <p class="card-text">Some quick example text to build on the card title and make up the bulk of the card's content.</p>
                        </div>
                    </div>
                    <!--/.Card-->
                </div>
                <!--Third columnn-->
                <!--First columnn-->
                <div class="col-lg-3 mb-r">
                    <!--Card-->
                    <div class="card wow fadeIn" data-wow-delay="0.6s">
                        <!--Card image-->
                        <img class="img-fluid" src="https://mdbootstrap.com/img/Photos/Horizontal/Work/4-col/img%20(37).jpg" alt="Card image cap">
                        <!--Card content-->
                        <div class="card-body">
                            <!--Title-->
                            <h4 class="card-title text-center">24/7 Support</h4>
                            <hr>
                            <!--Text-->
                            <p class="card-text">Some quick example text to build on the card title and make up the bulk of the card's content.</p>
                        </div>
                    </div>
                    <!--/.Card-->
                </div>
                <!--First columnn-->
            </div>
        </section>
        <!--/Section: Best features-->
        <div id="contact">
        <!-- dummy section for link -->
        </div>
        <div class="divider-new">
            <h2 class="h2-responsive wow fadeIn">Contact</h2>
        </div>
        {% block contact %}
            {% include 'includes/contact.html' %}
        {% endblock %}
    </div>
    <!--/ Main container-->
{% endblock %}
Last but not least, lets add JS script to navigate Google map and place marker in position of our choice. More about Google maps APIs can be found here.
/templates/public/home.html
1
2
3
4
5
6
7
8
9
10
11
12
13
14
15
16
17
18
19
20
21
{% block scripts %}
    {{ super() }}
    <script>
        function init_map() {
            var var_location = new google.maps.LatLng(52.0690115, 21.0198418,);
            var var_mapoptions = {
                center: var_location,
                zoom: 15
            };
            var var_marker = new google.maps.Marker({
                position: var_location,
                map: var_map,
                title: "New York"
            });
            var var_map = new google.maps.Map(document.getElementById("map-container"),
                var_mapoptions);
            var_marker.setMap(var_map);
        }
        google.maps.event.addDomListener(window, 'load', init_map);
    </script>
{% endblock %}
You may have noticed {{ super() }} expression in scripts block. In layout.html I placed some JS code to be present in all pages. Code is responsible for smooth scrolling to the page internal link. Calling super() allows to keep all previous content of the block from previous template and append new content to it. So we have smooth scrolling and Google maps initialization. For now we have only two functions, so it is reasonable to keep them in template code. But when amount of custom JS grows it is better to migrate to separate .js file and serve it from static folder same as framework files.
Obviously I am no web designer, but this simple stub should do the trick. Also we can see that Bootstrap and MDB gave us nice look and responsive design (hamburger button which expands to full navigation bar when shrunk below 768 pixels, material style of the buttons and navigation bar). There is additional element on the page - a very nice tool to debug flask web applications called Flask-debugtoolbar. It should be listed in dev requirements and installed automatically during environment configuration. It appears on the page as a button at the right top corner and allows to track current Flask session including app configuration, requests, routing, variables and many more.

Login, Register forms
It is time to secure our app. Basic tools for us will be login/register mechanism, which will allow app to securely exchange information with the server, second would be creating sessions and above all encryption of data exchange. To extract information from the server app uses HTTP GET method, whereas to send information to the server it uses POST method. There are other methods used in HTTP protocol, but we will focus on these two for now. Login and register forms will base on this two to communicate with the database, which will store information about users (see next section). Only logged users will be allowed to see dashboard. In addition logged users can see their own profile with the data app is keeping about them. Lets start with login page.
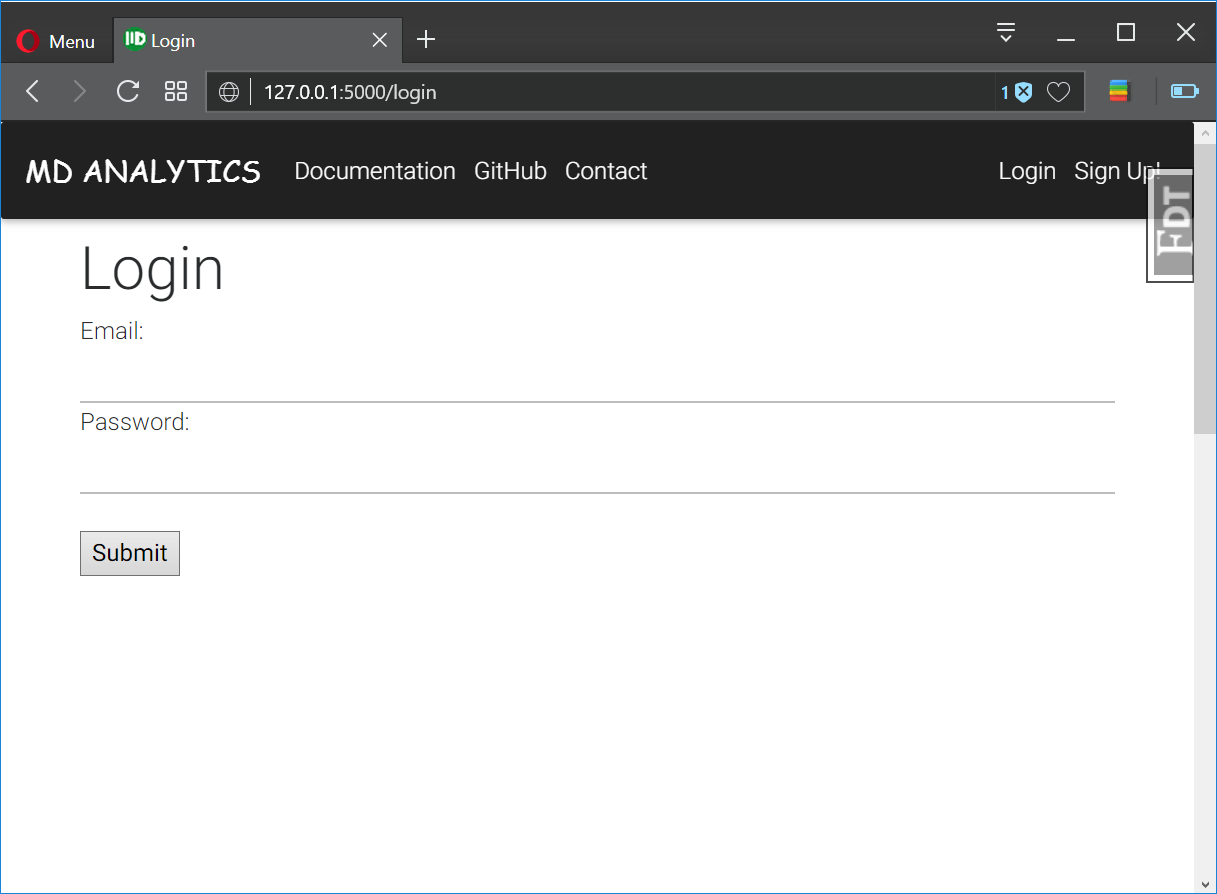
Login
First lets create login page with all fields, nothing fancy, just simple form with a bit of styling:
/templates/login.html
1
2
3
4
5
6
7
8
9
10
11
12
13
14
15
16
17
18
19
{% extends "layout.html" %}
{% set title = "Register" %}
{% block intro %}
<section class="view">
    <div class="container" style="padding-top: 75px">
        <h1>Login</h1>
        <form method="post">
            <span>Email: </span>
            <input type="email" name="email", required="true">
            <br>
            <span>Password: </span>
            <input type="password" name="password", required="true">
            <br>
            <br>
            <input type="submit">
        </form>
    </div>
</section>
{% endblock %}
Register
Now very, very simple register form:
/templates/register.html
1
2
3
4
5
6
7
8
9
10
11
12
13
14
15
16
17
18
19
20
21
22
23
24
25
26
{% extends "layout.html" %}
{% set title = "Register" %}
{% block intro %}
<section class="view">
    <div class="container" style="padding-top: 75px">
        <h1>Create account</h1>
        <form>
            <span>Name: </span>
            <input type="text" name="name", required="true">
            <br>
            <span>Email: </span>
            <input type="email" name="email", required="true">
            <br>
            <span>Password: </span>
            <input type="password" name="password", required="true">
            <br>
            <br>
            <span>Re-type Password: </span>
            <input type="password" name="password", required="true">
            <br>
            <br>
            <input type="submit">
        </form>
    </div>
</section>
{% endblock %}
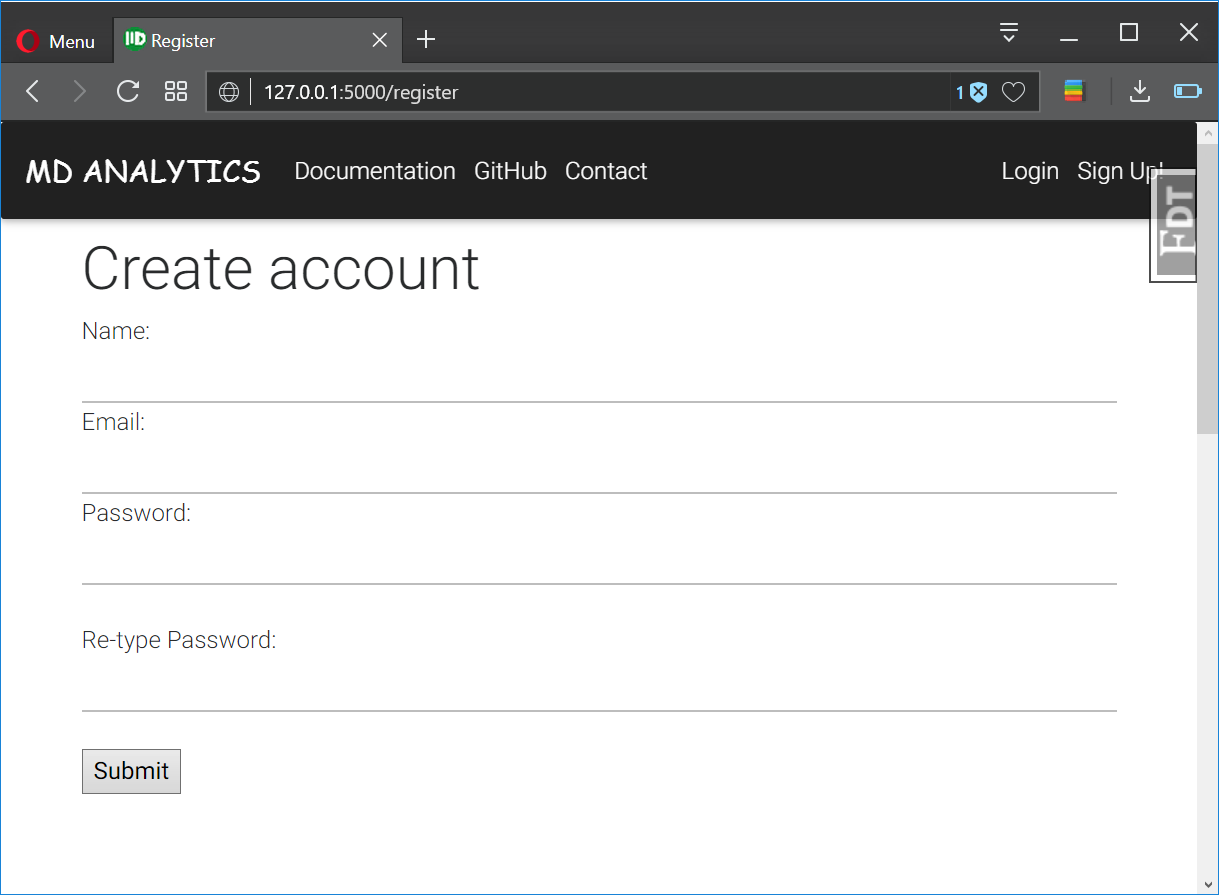
Again, this code does nothing, except it looks good in the browser. All the magic like validation, verification will happen behind the stage, described in details in next sections.
MongoDB
Before we dive into login/register python machinery I would like to address few topics related to this issue. First is database choice. I decided to store user provided information and data received from social media providers in NoSQL database - MongoDB. Main reason is that different providers have different data models. Friends, followers lists, text or media content of the posts, software repositories. Variety makes nearly impossible to fit them in some sane common relational database. In MongoDB, JSON like format of the data is playing nicely with the data format given by providers (API requests return JSON responses). JSON can be easily manipulated in python and converted tot he dictionary container. It is also very easy to store and manipulate graph-type data. To communicate with db we will use excellent Flask extension: flask_pymongo. Pip install it pip install flask_pymongo if package is not installed on your system.
First lets register PyMongo extension (and add flask_pymongo==0.5.1 to the requirements list in production):
/app/extensions.py
1
2
3
4
5
...
from flask_pymongo import PyMongo

...
mongo = PyMongo()
And add to register_extensions() in main application:
/app/app.py
1
2
3
4
5
6
7
8
9
10
11
12

from app.extensions import debug_toolbar, mongo
from app import public

...
def register_extensions(app):
    """Register Flask extensions."""
    debug_toolbar.init_app(app)
    app.logger.debug("Debug toolbar initialized")
    mongo.init_app(app)
    app.logger.debug("Debug mongo initialized")
    return None
This will attach PyMongo db to the current app using default name or name specified in settings.py file.
Sessions
Sometimes URL’s contain additional parameters submitted in the URL (i.e http://www.domain.com/endpoint?key=value). One can access them via Flask request object (request.args attribute) and store them in the cookies attribute (request.cookies) for later usage. However using cookies is not preferred to store requests data, especially sensitive one like credentials or authorization tokens, therefore it is recommended to use more secure solution and it is__session__.
Session stores request parameters specific to a user from one request to the next. But it does it in more secure way, by adding additional security layer on top of cookies. To secure data serialized in cookie it uses secret key provided by the app. User can not modify session parameters, unless has access to this key. In our case we will use app configuration to set strong secret key with os.urandom(24), which generates 24 random bytes suitable for cryptographic use. We set this parameter as a SECRET_KEY in base class of the config file. Configuration key is inherited by all child classes, and passed further to each app instance upon app creation by create_app() function.
Session or cookie usually resides on client side. We will go one step further and use Flask extension to manage server side sessions in our app. Because our app is meant to analyze social media data, it will certainly have to be able to gather and process amounts of data above average cookie capacity (counted in tens or even hundreds of MB). And we do not want to send hundreds of megabytes through Internet from our server, where app runs, to the clients browser. To make it possible we will use very handy Redis NoSQL database, which can operate in memory and store data in form of key:value pairs. Here we will use Redis to store session data. Extension will hook up to the app and allow to use it through standard Flask session object.
Fortunatelly we do not have to write our own Redis interface to interact with it. Flask-Session will take care for it, using some default settings and some values taken from app configuration. However few things must be done to use Redis as a server side session storage:
- Add
SESSION_TYPE = 'redis'to the config file - Download, install and add Flask-Session extension (don’t forget to add Flask-Session==0.3.1 to
requirements/prod.txt)
/app/settings.py
1
2
3
4
5
class Config(object):
    SECRET_KEY = os.urandom(24)
    ...
    SESSION_TYPE = 'redis'
...
Once it is done we can append extensions.pywith Flask-Session initialization:
/app/extensions.py
1
2
3
4
...
from flask_session import Session
...
sess = Session()
and register it with the app:
/app/app.py
1
2
3
4
5
6
7
8
9
from app.extensions import debug_toolbar, mongo, login_manager, sess

def register_extensions(app):
    """Register Flask extensions."""
    debug_toolbar.init_app(app)
    mongo.init_app(app)
    login_manager.init_app(app)
    sess.init_app(app)
    return None
Finally lets use it in our app. Lets make session to store users data during registration and then compare them during signing in. This is just temporary solution, to show how session works. Our primary storage will be MongoDB and Redis will serve as a cache to keep some data obtained from API’s of social media providers. Processed data will be also stored in MongoDB.
/app/public/views.py
from flask import Blueprint, render_template, redirect, session


blueprint = Blueprint('public', __name__, static_folder='../static')


@blueprint.route('/')
def home():
    """Home page."""
    return render_template('public/home.html')


@blueprint.route('/login')
def login():
    """Login page."""
    return render_template('public/login.html')


@blueprint.route('/register')
def register():
    """Register page."""
    return render_template('public/register.html')


@blueprint.route('/logout')
def logout():
    """logout link."""
    return redirect(url_for('home'))
Flask-Login
To restrict
Data storage
- MongoDB,
- security with bcrypt - password passed in POST http call.
/app/settings.py
User model
(md_analytics) [mdyzma@devbox md_analytics]$ tree .
.
|-- app/
|   |-- user/
|   |   |
|   |   |-- static/
|   |   |
|   |   |-- templates/
|   |   |   |
|   |   |   `-- user.html
|   |   |
|   |   `-- views.py
...